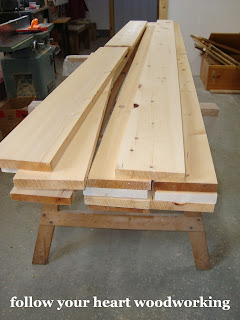
My pine is all ready to go. Knotty Pine is difficult to work with because there are often holes and cracks in the knots. I try and work around that as much as possible, but I love the look of pine, and I feel the knots just add character.
For the panels in my doors I was going to put 1/4" pine faced plywood. In my local city I could not find 1/4" ply that had two good sides which I need for the doors because they are seen from both sides. Instead I bought tongue and groove pieces to fit in the panelled area. These pieces are 3" wide and 8' long, used for walls mostly. I would not use this again for this application as it was a lot of extra work preparing the pieces. Plywood is a MUCH better product and I should have looked elsewhere or special ordered it.
So, I'll get to them later, but these pieces for the panels are just under 5/16" thick, so the rails and stiles that contain the panels need grooves that are 5/16" wide.
I set up the dado blades on my table saw to cut the grooves which are 5/16" wide and 5/16" deep.
For the 3 regular doors I need to cut grooves as shown in red here:
So the top and bottom rails need a groove on one edge only. The middle rails need grooves on both edges. The stiles need a groove down one edge only. For the larger door, there is an additional center stile that needs a groove on both sides.
Remember the top and bottom rails are wider at 5 5/8", all other rails and stiles are 5" wide. This has to be kept in mind when putting the grooves in the pieces.
All the pieces have the appropriate grooves in them:
.JPG)
Now on to the haunched mortise and tenon. This joint gives stability to a large door, especially one with panels that are not glued in. My panels are not plywood, but solid wood and therefore must be left to expand and contract with the seasons.
The tenon is supposed to be about 2/3rds the width of the piece. The tenon cannot go too near to the top or it will not leave enough wood in the mortised piece. The stile is mortised to accept the tenon on the rail and of course if the large mortise is too near the top of the door, there will be no strength there. The haunch is left at the top (as seen in the photo below) to fit into the groove of the stile that I just did on the tablesaw.
First I make a sample haunched tenon with a scrap piece of wood milled to the same thickness and width as the top rail. Using my tablesaw and a wide dado set, I take off an equal side depth from each side of the scrap rail to leave a tenon thickness of 5/16" thick. The width of the tenon is 2 1/2" so I set the fence at 2 1/2" away from the far left of the blade and take as many passes as needed to get the faces of the whole tenon cut away.
After that I cut the small piece off the top to make the haunch.
Using this piece I take another scrap piece substituting for the door stile and mark the width of the tenon on the edge of it where the groove is. I clamp two pieces of wood firmly on my drill press so that my stile can fit between them and actually slide side-to-side when drilling. Then I drill out using a 5/16" wide bit to a depth of 2 1/2". I find it the best to drill a hole each end of the mortise and then drilling between those holes, since this keeps straight sides on the deep mortise. (Although this does not show the right-hand side hole drilled, I did drill it before I got any farther.)
Now, will it fit?
* If possible when cutting your stiles, for strength while mortising, it's best to leave a bit of extra length past where the mortise will go, these are called "horns" and can be cut off later *
Here are a few pictures to show the fitting of the tenon into the mortise:
Here you can see how the haunch part at the top fits into the groove, but not into the mortise:
Ta da!!
So then the horn would be cut off:
And leave this at the top (or bottom) of the door:
Enough for today, hope you are still following!
Labels: dado blades, drill press, pine, tenon, workshop

.JPG)