I often get orders from people who have either seen my work at Farmers' Markets I go to, or see products for sale online at Kijiji.
I was contacted through email for an order for a sign with the family name on it, hanging from a post. I also had to supply the post!
When I get an order like this I use email to send links to signs I've previously made and shown here at my blog, or photos of signs I haven't yet posted. This way the client can choose from many different styles, colours, sizes, and fonts and settle on something they feel is suitable for what they want.
This lovely lady chose a white sign with black lettering. It is the same on both sides and will hang at the end of her driveway.
Now to make the post...
I purchased an 8 foot 4"x4" pressure treated post and cut about 3' off one end to use as the horizontal member. The vertical piece and horizontal piece will lock together with 1/2 of the depth of the wood cut out of each piece. (This is called a half-lap joint) Here is the pencil marking of what will come out of the vertical piece.
I use my sliding compound mitre saw to work away at the post. The saw can be set to only cut down to the width you want, so that it doesn't cut right through the post. In order to do that, you also need to set a scrap piece of wood between the piece you are cutting and the back fence. You can see where I have clamped a 4 x 4 piece to keep my post the correct distance to give a straight level cut.
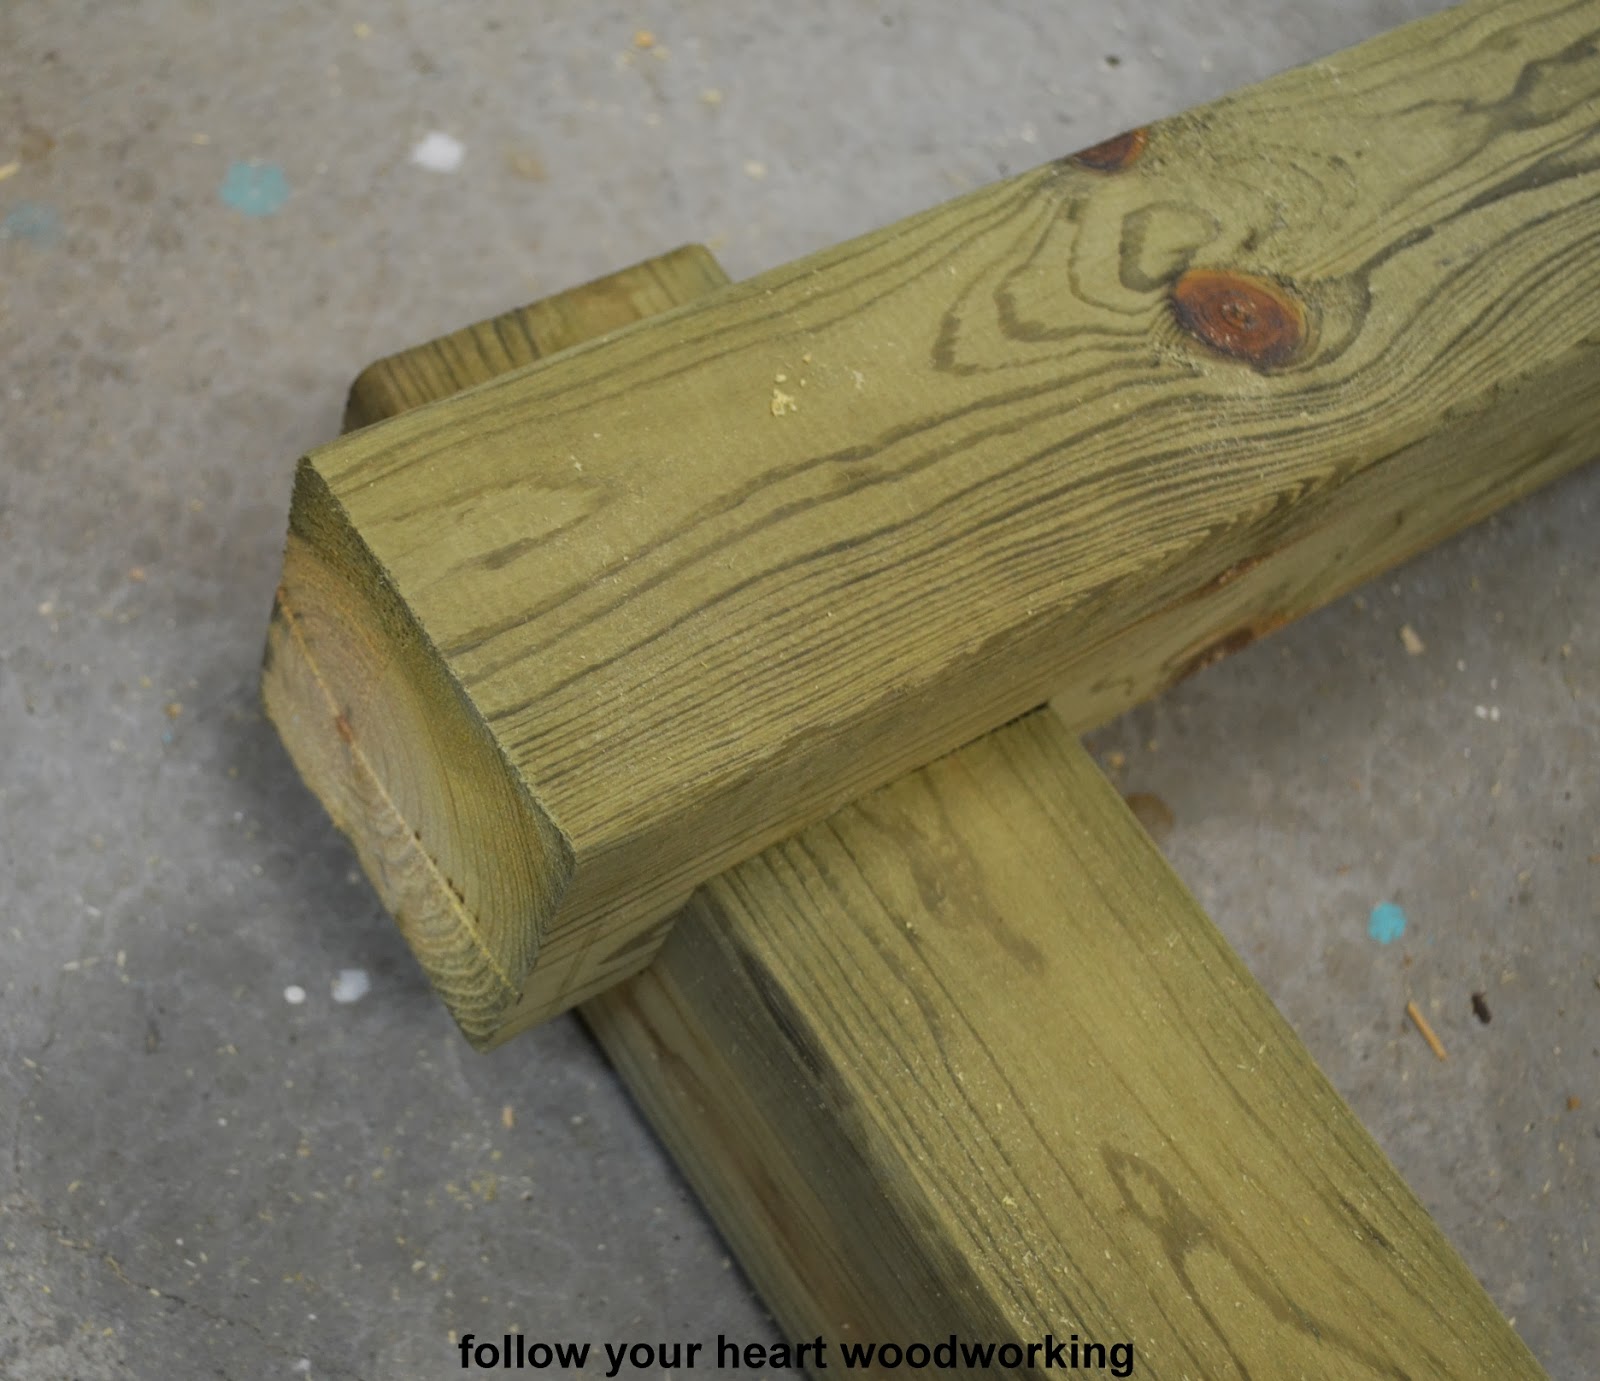
Here you can see the full notch cut out. This is the same cut for both vertical and horizontal pieces.
Of course you need to be accurate with this in order for the pieces to fit tightly together. Here are the two notches cut out:
They are then fit together, fingers crossed...
Ta da!
I then drilled a hole in the center and used a large carriage bolt with a washer and nut on the back to hold the pieces together more firmly.
The sign then has eyes screwed into it and hooks into the crosspiece. This shows it at my house before delivery:
 I also supplied a ground spike for the post to sit in, these are available at lumber or DIY type stores. It is hammered into the ground using first a short scrap piece of 4 x 4, and then the post is fit into it and screws in the top of the spike box are tightened.
Here is the sign at the owner's home:
Thanks to Sam for trusting in me to make just what she wanted for her family home.
Sharing at:
My Repurposed Life
Labels: signs, tutorial