
However, some of you are printing out your letters and numbers in full solid black ink. Did you know that if they are large letters you can just print out the outline? Usually that is all you need anyway.
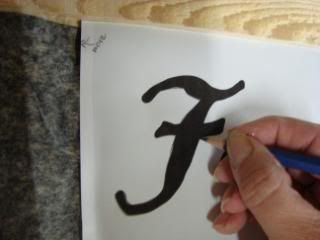
I use the carbon paper transfer technique where I print the words on my home printer and then put a piece of carbon paper between the printed words and the wood. I show it more detailed here in this blog post
And that post shows my fonts printed as solid filled in letters. This was a few years ago before I discovered that there was a way to just print the outlines.
Now I print just the outlines so they look more like this:
Before:


Okay, here's the steps:
· Open your word program (I use
Microsoft Word Starter 2010 which came free with my computer, other programs
may be different, but most should have this option for outlining.)
· Go to the Home Tab if you are not
already there
· Type your word or words in the font
you prefer and enlarge to the size you want. (I find with small or thin fonts I
don’t worry about the letter being filled in because it won’t save much or any
ink anyway.)
· Highlight the text you want to
outline.
· While still at that Home Tab, look
for the small “Font” heading under where you have chosen your font and also
under the place where you select Bold,
Italic and Underline, etc.
Click on the tiny arrow to the right of where
it says “Font” and to the left of where it says “Paragraph”
· You should be in a box with two tabs,
Font and Advanced. You should be in the
Font tab, if not, select that.
· At the bottom click on “Text Effects”
· This will take you to another box and the first thing should be “Text Fill,” for this application (outlining) select “No Fill”
· This will take you to another box and the first thing should be “Text Fill,” for this application (outlining) select “No Fill”
· Do not Close yet, pick the next
heading down on the left which is “Text Outline” and select “Solid Outline” and
then choose Black or what you prefer for the
colour. I leave the Transparency at “0 %”
· Click Close to get out of that box
and then OK to get out of the first Font box.
Your letters
should then show as outlined!
At this
point you can still highlight them and change them or make them bigger or
smaller by using the original Font name and size box.
I hope that this has helped some of you, it certainly has saved me a lot of ink over the past couple of years. Thanks to Deb of Lake Girl Paints for encouraging me to write this and helping me to test it out.

Sharing at these blogs:
Cedar Hill Ranch's The Scoop
Thanks again, Julie, for helping me to save on printer ink! I love learning techy new things.
ReplyDeleteMuch appreciation,
Deb@LakeGirlPaints
Smart! I didn't know about that option. Thanks very much!
ReplyDeleteDavid
I had no idea this could be done! Yes, I'm one of those printing in full solid black ink! Well, not anymore, thanks Julie!
ReplyDeletegreat money saving tip. thank you so much. and thanks for the tutorial on how to do the transfer. I will use that in the future.
ReplyDeleteGreat tip! I knew this but don't know why I never do it... thanks for the reminder!
ReplyDeleteSusan
That is a great great tip Julie!!!
ReplyDeleteXOX
Good idea! I actually have started to change the color to light gray :) Thank you for sharing this at Rustic Restorations Weekend!
ReplyDeleteGreat tip Julie! You are so smart, I will have to do this next time! Thanks!
ReplyDeleteWhat a great idea! Thanks for sharing!
ReplyDeleteGreat tip! Thank you. I can't wait to see if my program can do that. I have an older Word program.
ReplyDeleteHello dear.You have written a great post. Going to share with my followers on twitter. Thanks for sharing.
ReplyDeleteReflective Vinyl
Love it! Thanks for sharing the tip!
ReplyDeleteThis comment has been removed by a blog administrator.
ReplyDeleteThank you for taking the time to post this information. I just painted a tall chest of drawers and wanted to number the drawers, but hated to use all of my ink up on printing solid numbers.
ReplyDelete