I use a lot of pallet wood for things I make. Often the edges are quite worn away and the piece doesn't leave enough flat space for many of my projects. But what to do with the worn edge pieces?
My thoughts were to rip the pieces down the middle and make frames.
My frame will be around a blackboard, since I am making a few to sell at the Farmer's Market.
So... first get two pieces of pallet wood long enough to be the sides of your frame (always go at least a few inches longer on each end so there's room for error and in case there is some bad tear out or knots you are trying to avoid). Of course you could use one long piece, but what I had were shorter cutoffs with, as I said, worn edges.
Find the middle of your wood so that you can cut down the middle and have pieces of equal widths.
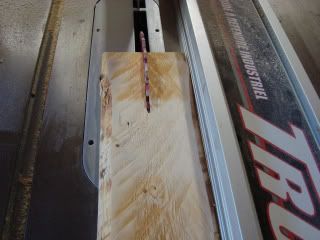
Rip your wood down the middle after figuring out the half way point. Each piece you rip will give you two pieces which can go opposite each other at the top and bottom or each side.
 |
| *The blade cover has been flipped back out of the way for this and the next photo only to show the rip, always use the safety devices that come with your power tools* |
Don't forget to take your rabbit push stick (instructions to make your own HERE) along for the ride!
You will need four pieces and the length depends on the size of blackboard you are wanting to make. My pieces were about 22" to start.
After ripping, measure the thickness of your blackboard material. I'm using 1/4" thick hardboard which I paint with one coat of black paint and then two coats of blackboard paint BEFORE gluing into my project.
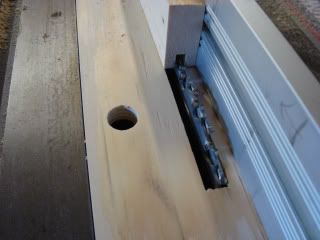
You need to put a groove in your four frame pieces that is just a tiny bit wider than the thickness of your blackboard. I use my table saw and dado blades. If you don't have dado blades you can use your regular blade and run the frame pieces over it as many times as it takes to get a wider groove. (For those who don't know, dado blades are stacked blades that can be configured to make different widths of cuts on the table saw. Many regular saw blades are 1/8" wide, but adding dado blades together you can make the 1/4" you need so that it takes one pass over the wider blade)
You always need to test to make sure your width is correct as well as the depth of the groove. I use a depth that allows the black board to fit in snugly at about 3/8". You want the groove centered on the frames inside edges.
Don't cut these to length just yet, keep them longer than you need.
Your top and bottom pieces have to be cut to length exactly the full width of your blackboard.
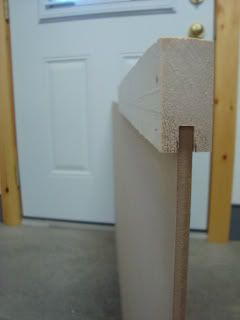
After that is done you can use a wider dado blade set up to make a tongue on the top and bottom pieces that will fit into the groove of the side pieces.I push mine along with the mitre gauge.
What you are doing is taking away the wood from the top and bottom and leaving a tongue in the middle (the opposite of making a groove). Make some test cuts so that the tongue is a perfect fit.
Fit all your all your pieces around the blackboard and then you can cut the side pieces to the proper length. This will be longer than the height of the blackboard because it holds the bottom and top pieces inside it's groove as well as the blackboard.
I knew my frame would be painted turquoise so I first painted the inner edges where it will meet the blackboard. This is easier to do before gluing because you avoid getting paint on the blackboard or having to mask it off.
Glue up the pieces and use clamps to hold it until it dries (only about an hour).
After it's dried, remove the clamps and paint the rest.
My finished frame is 18" long x 14 1/2" wide.
Showing this at the following blog parties:
Labels: blackboard/chalkboard, dado blades, frames, home accessories, pallet wood, reuse